Temperature influence in bearings manufacturing
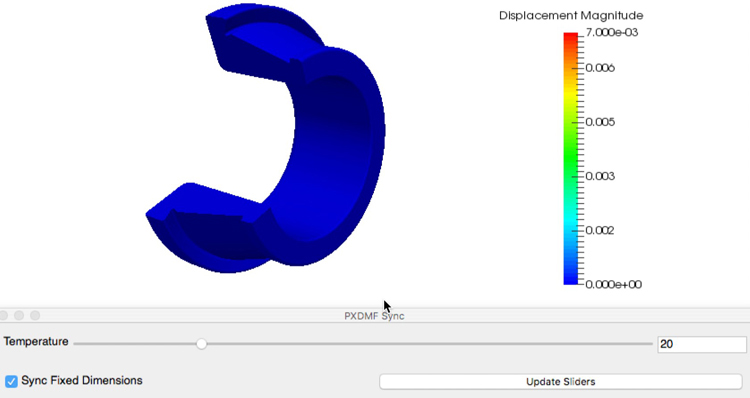
The manufacturing process of tapered roller bearings consists of rings machining processes and components assembly. Environmental, process and machine parameters influence manufacturing, affecting the dimensions of the final product. Fersa Bearings, as STREAM-0D end-user, is tackling errors caused by temperature variations in order to eliminate dimensional uncertainty.
Bearing industry is a high competitive market that is estimated $40 billion: the top six world bearing manufacturers (SKF, Schaeffler Group, Timken, NSK, NTN, and JTEKT) represent about 60% of the global rolling bearing market. Fersa Bearings must deal with these huge manufacturers and others, placed in low cost countries.
Bearing manufacturing is a high precision technology, where material composition, hardness and micrometric dimensions need to be ensured to reach the product requirements. In this context, process control, automation and optimization are crucial to obtain best quality while safeguarding competitive costs.
Process control ensures quality and reduce scrap and rework, so dimensional measurements need to be done. In the bearing manufacturing environment, temperature heavily affects dimensions and so such variable must be taken into account.
Equipment and measurement process
The measurement of the diameter is carried out using a mechanical comparator, a registration tool to position the ring and two temperature probes, one per contact to measure the temperature of the piece and another to measure ambient temperature.
| Equipment | Range | Resolution | Expanded uncertainty (k=2) |
| Mechanical comparator (probe) | -1.5/+1.5 mm | 0.001 mm | 0.0013 mm |
| Contact probe thermometer | 0 to 250°C | 0.1°C | 0.39°C |
| Thermocouple probe thermometer | -50 to 100°C | 0.1°C | 0.40°C |
Table 1. Components of the measurement system.
These probes are made of one thermocouple, useful to assess the environment temperature – thus the temperature of the master piece –, and a contact probe thermometer, useful to acquire the temperature of the piece. A mechanical comparator is also needed, to assess the dimensional difference between the master and the production piece.
The tooling is adjusted using a standard part (or master). The adjustment of the tooling consists of fixing the position in the X direction: serving this purpose is a master piece, whose previously calibrated diameter (at 20ºC in a temperature monitored room) corresponds to the nominal diameter to be measured with the system. The contact point is shifted in X direction until the maximum indicated by the probe is obtained. In this position the tooling is set. This operation is carried out each time the reference is changed.
Once the tooling is adjusted, the zero of the comparator with the diameter of the masterpiece is set as reference. This operation is performed every 30 minutes (approximately every 50 parts checked).
The execution of these two steps, allows the system to be ready to measure the diameter of the rings after being grinded, so that its temperature is higher than the ambient temperature at the time in which the measurement is performed.
The system and the master piece are kept in the workshop so both elements can be considered at room temperature.
The system adjusts the diameter of the workpiece by increasing or decreasing the diameter depending on the temperature. If the temperature of the workpiece is lower than the one of the master piece, the system decreases dimensions according to the diameter and the temperature variation, in real-time; if the temperature of the workpiece is higher than the one of the master piece, the system increases dimensions according to the diameter and the temperature variation, in real time. The effect is as measuring the parts at the same temperature.
The coefficient for steel lineal thermal expansion is used.
Technical process information
Tolerances are 13 to 25 microns; the average temperature variation is 5°C in one day and more than 15°C between different seasons and the average diameter in production line is 150 mm.
The dimensional effect of ambient temperature and coolant changes are
- 0,008 microns per day
- 0,023 micron in change of station
Practice in production line
As a starting step, and as described before, an operator carries out an hourly manual control of the outer diameter. This shows variations of to 5°C at the beginning of the production cycle and more than 8°C after the line has stopped.
This manual adjustment of the process allows a decrease in the variation up to 2°C (between work piece and master piece); control is performed at the start of the series and after its ceasing (Short Manufacturing Series).
Once the manual test has been accomplished, an automatic control is installed in the production line, in which diameter as well as part temperature, allow measurement adjustments. With a special communication between control and grinding machine, the system can correct the manufacturing process taking into account real dimensions of produced parts.
Measuring and controlling dimension variation, with experimental rules and instructions implemented, are sent to the machine therefore increasing the process increase capabilities.
To ensure the operability of the system, a control for every shift is needed: this is carried out verifying during the first and the second half of the shift if the real dimension is correct.
With an average diameter of 150mm and a production of more than 50 thousand parts per month, after 6 months:
- Line with temperature control: PPK of 1.61, that means 0.72 PPM
- Line without Temperature control: PPK reduced to less than 0.95, increasing PPM up to 2220.
Measurement conclusion
Some dimensions in bearings, which require precise tolerance, are highly influenced by temperature. Here are some of the aspects to keep under control in order to have a stable and capable manufacturing process, with a CPK of more than 1.33:
– temperature affects dimensional measurement so
– the process must be corrected with previous results, through manual or automatic adjustment in grinding machine;
– rework or/and scrap rate will be increased otherwise.
Check Bits of STREAM-0D’s previous contributions by STREAM-0D partners:
- Ep. 1 – ITAINNOVA – “Simulation for zero-defects manufacturing”
- Ep. 2 – ITAINNOVA – “STREAM-0D End-users”
- Ep. 3 – DAY ONE – “Exploitation of a European project: how to start and key activities”
- Ep. 4 – LMS – “Industry 4.0 and zero-defects manufacturing: an insight on a new industrial era”
- Ep. 5 – IES – “Cloud data management: what is it all about?”
- Ep. 6 – ECN – “Reduced-Order Models, augmented knowledge”
- Ep. 7 – STAM – “Discrete manufacturing: model-based process optimization and control”
Follow STREAM-0D on:
